Through whitelisting, a user remote controlling the Host will only be able to see and control the whitelisted applications. Both keyboard and mouse will not be transmitted to other applications except to the whitelisted ones and any non-whitelisted application will be masked out from the remote view.
Whitelisted applications can be managed:
- On the Host (Host is version 12.72 or later)
- On the Netop Security Server (Host is version 12.73 or later)
- On the Netop Portal (Host is version 12.74 or later)
More information is available below.
Through whitelisting, a Guest user remote controlling the Host will only be able to see and control the whitelisted applications. Both keyboard and mouse will not be transmitted to other applications except the whitelisted ones and any non-whitelisted application will be masked out from the remote view.
Configuring application whitelisting
Host configuration
Prerequisites:
- Netop Host version 12.72 or newer
- Any of the following Guest Access Methods should be used on the Host:
- Grant All Guests default access privileges
- Grant each Guest individual access privileges using Netop authentication
- Grant each Guest individual access privileges using Windows Security Management
- Grant each Guest individual access privileges using Directory services
Recommended but not required:
- Netop Guest version 12.72 or newer
Steps
The steps below are to be executed on the Netop Host.
- Go to your Netop configuration files folder. Here is the default path to the Host's configuration files by Windows operating system:
Windows 7 32-bit, Server 2008 32-bit, Vista 32-bit
C:\ProgramData\Netop\Netop Remote Control\Host
Windows 7 64-bit, Server 2008 64-bit, Vista 64-bit
C:\ProgramData\Danware Data\C\Program Files (x86)\Netop\Netop Remote Control\Host - Create and edit a file called whitelisted.txt.
- Add the applications which should be accessible by the Netop users, one per line. See below more details on how to edit the whitelisted.txt file.
- in the Host, access Tools - Guest Access Security , and choose one of the above Guest Access Methods
- Either change an existing security role, or create a new one.
- On the right side of the security role definition, choose Yes for the Whitelisted applications option.
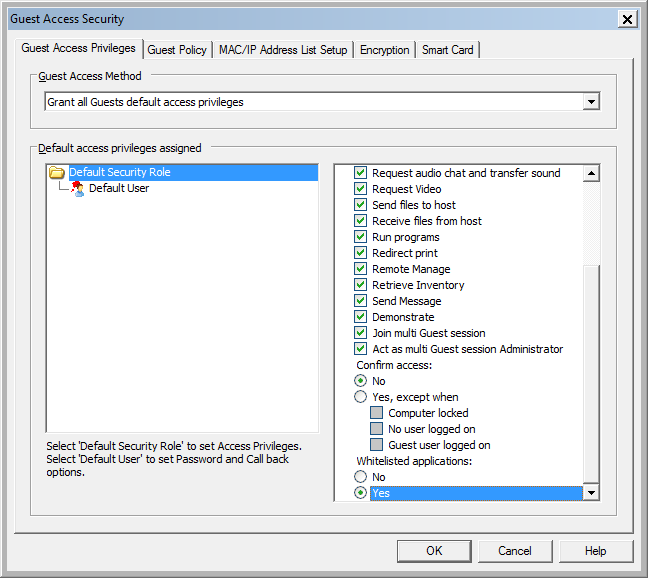
7. Add users or groups to the above security role. Those users will only be able to access the whitelisted applications.
Note that you can still have other security roles which provide full access to the Host.
Things to consider
- Certain functionality of the Windows operating system (such as: Windows taskbar, logon/lock screen, screen saver, Start Menu) will not be available by default through whitelisting; make sure these are not needed by a remote user, when enabling whitelisting.
- Some functionalities of the Windows operating system will be disabled by default in a Remote Control session with whitelisting, to provide an optimum experience for the user, such as Aero Peek; the keyboard will be automatically switched to Local Keyboard in order to avoid triggering commands which will mask out whitelisted applications, such as pressing the Start menu, CTRL-ALT-DEL or ALT-TAB shortcuts.
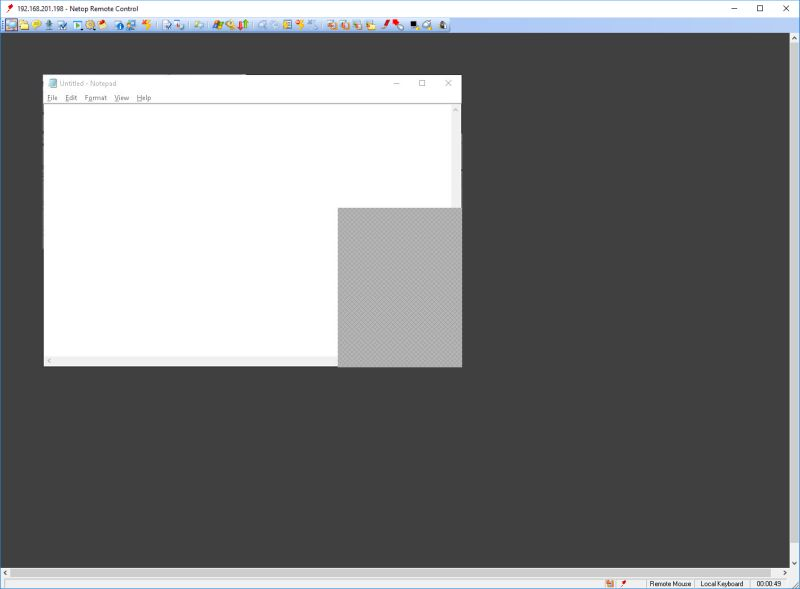
- if a whitelisted application is obscured by a non-whitelisted application, a gray masking is shown over the obscured area of the whitelisted application, as can be seen in the below image.
Defining the whitelisted applications
Whitelisted applications are defined in the whitelisted.txt file, one application per line, in any of the following ways:
- full path of the application (including the executable name). For instance: C:\Windows\System32\notepad.exe
- executable name. For instance: notepad.exe
- any of the above, including system environment variables. For instance: %windir%\system32\notepad.exe
Customizing the whitelisted.txt location
If you would like to have the whitelisted.txt file in a different location than the Netop configuration files folder, you can customize it in the impero.ini configuration file.
To do that, edit the impero.ini file located in C:\Windows. Open this file using Notepad and look for the heading [HOST]. Under that heading add WHITELISTING_FILE=[file path], where [file path] represents the new location for the whitelisted.txt file. In the end, netop.ini should contain something like:
[HOST]
WHITELISTING_FILE=[file path]
Security Server configuration
Prerequisites:
- Netop Host version 12.73 or newer
- Netop Security Server version 12.73 or newer
- The following Guest Access Method should be used on the Host:
- Use Netop Security Server
Recommended but not required:
- Netop Guest version 12.73 or newer
Steps
The steps below are to be executed on the Netop Security Server.
- Open the Security Manager and go to Netop Security Management > Security Settings
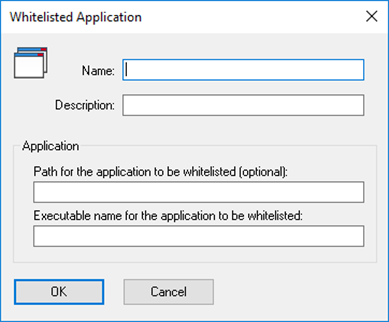
- Add one or multiple applications that you would like to whitelist
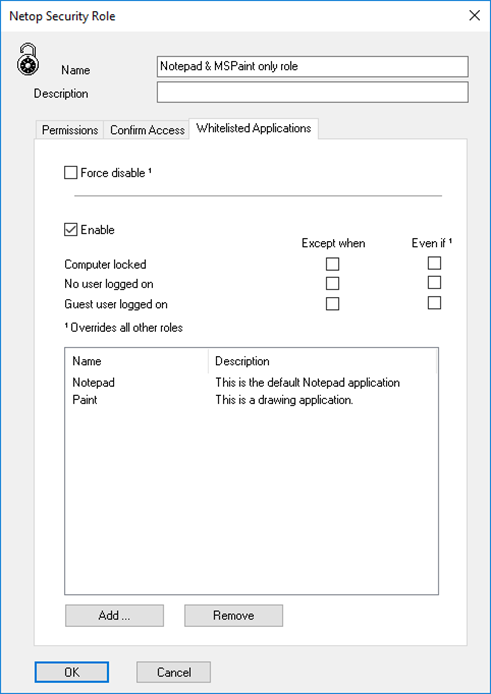
3. When creating the Role, add the applications you would like to whitelist in the Whitelisted applications tab
4. Next time the Guest connects to the Host and the above Role applies, only the whitelisted applications will be visible
Netop Portal configuration
Prerequisites:
- Netop Host version 12.74 or newer
- An active Netop Portal account
- The following Guest Access Method should be used on the Host:
- Use Netop Portal access rights
Recommended but not required:
- Netop Guest version 12.73 or newer
Steps
The steps below are to be executed on the Netop Portal.
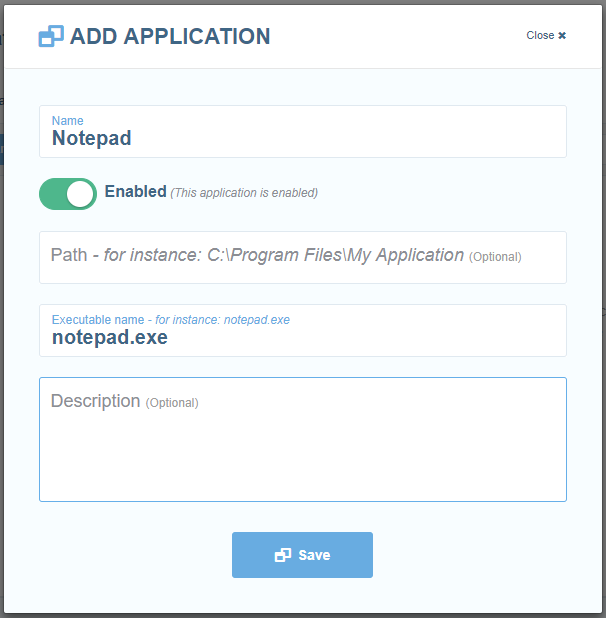
- Login into the Portal and go to Settings > Manage > Applications (you must be logged in as an Account Administrator or higher).
- Add one or multiple applications that you would like to whitelist.
3. When creating the role assignment, add the applications you would like to whitelist
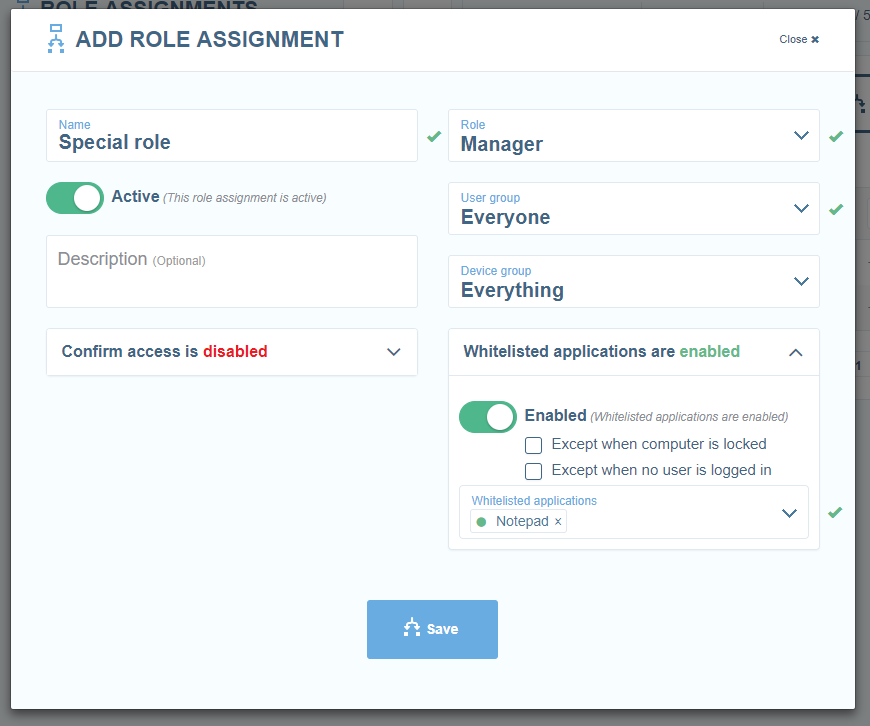
4. Next time the Guest connects to the Host and the above role assignment applies, only the whitelisted applications are displayed.
Was this article helpful?
That’s Great!
Thank you for your feedback
Sorry! We couldn't be helpful
Thank you for your feedback
Feedback sent
We appreciate your effort and will try to fix the article